Ruby on Rails ログイン画面の作成
下記のページを参考にログイン画面を作ってみた。
Running Cadence: Ruby on Rails3.2でログイン機能を実装する。
アンドロイド・アミーゴ・Rails Ruby on Railsログイン機能
KENJIRO LIFE: Ruby on Rails の flash 変数
[環境]
Windows8
Ruby 1.9.3(p125)
Ruby on Rails 3.2.9
前回作ったlessonプロジェクトにログイン画面を作ってみた。
①bcrypt-rubyをインストール
lessonフォルダにあるGemfileのbcrypt-rubyのコメントを外す。
# gem 'bcrypt-ruby', '~> 3.0.0'
↓
gem 'bcrypt-ruby', '~> 3.0.0'
コマンドプロンプトでインストール実行。
bundle install
②ユーザーmodelを作成する。
コマンドプロンプトで下記のコマンドを実行。
rails g model user name:string password_digest:string
※password_digestのカラム名は変更してはいけない。
③マイグレーションの実行(usersテーブルを作成)
コマンドプロンプトで下記のコマンドを実行。
rake db:migrate
④にhas_secure_passwordを追加
\app\model\users.rbにhas_secure_passwordを追加する。
class User < ActiveRecord::Base
  has_secure_password
end
⑤ユーザーアカウントを追加
コマンドプロンプトで下記のコマンドを順番に実行。
rails c
User.create!(:name => "admin", :password => "test", :password_confirmation => "test")
exit
⑥コントローラを生成
コマンドプロンプトで下記のコマンドを実行。
rails g controller logins
※コントローラ名は複数形にすること。
⑦コントローラ処理実装
ログインに成功したらトップへリダイレクト。
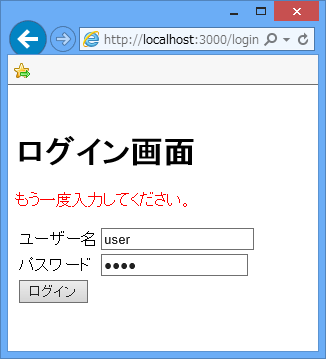
失敗したら同じフォームを再描画(「もう一度入力してください。」とメッセージを表示)。
\app\controllers\logins_controller.rbに下記のように書く。
class LoginsController < ApplicationController
  def show
      render "new"
  end

  def create
    user = User.find_by_name params[:name]
    if user && user.authenticate(params[:pass])
      # セッションのキー:user_idへユーザーのIDを登録
      session[:user_id] = user.id
      redirect_to root_path
    else
      # flash変数にメッセージをセット
      flash.now.alert = "もう一度入力してください。"
      render "new"
    end
  end

  def destroy
    session[:user_id] = nil
    @current_user = nil
    redirect_to login_path
  end
end
⑧ログインフォームの作成
\app\logins\new.html.erbに下記のように書く。
<h1>ログイン画面</h1>

<!-- フラッシュ変数のメッセージを表示(ログインエラー時のみ) -->
<p><font color=red><%= flash[:alert] %></font></p>
<%= form_tag login_path do %>
<table id="login_form">
  <tr>
    <td><%= label_tag :name, 'ユーザー名' %></td>
    <td><%= text_field_tag :name, params[:name] %></td>
  </tr>

  <tr>
    <td><%= label_tag :pass, 'パスワード' %></td>
    <td><%= password_field_tag :pass, params[:pass] %></td>
  </tr>

  <tr>
    <td><%= submit_tag "ログイン" %></td>
  </tr>
</table>
<% end %>
⑨ルートの追加
\config\routes.rbに下記を追加。
resource :login
※今回は単数リソースを使用する。
➉ビュー用ヘルパーメソッドの定義
ビューからログインユーザーを参照できるようにする。
\app\controller\application_controller.rbに下記のように書く。
class ApplicationController < ActionController::Base
  protect_from_forgery

  def current_user
    if session[:user_id]
      # @current_userがnilかfalseならログインユーザーを代入
      @current_user ||= User.find(session[:user_id])
    end
  end

  helper_method :current_user
end
⑪ビューにログイン機能へのパスを追加
トップページにログイン・ログアウト機能を追加してみる。
\app\views\top\index.html.erbを次のように修正。
<h1>トップページ</h1>
<p>Hello Ruby!</p>

<% if current_user == nil %>
  <%= link_to "ログイン", login_path %>
<% else %>
  <%= link_to 'ログアウト', login_path, :confirm => 'ログアウトしますか?', :method => :delete %>
<% end %>
⑫サーバーを起動する
rails server
⑬下記URLにアクセスする
http://localhost:3000/
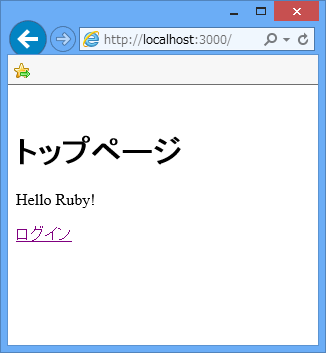
<トップページ>
http://localhost:3000/

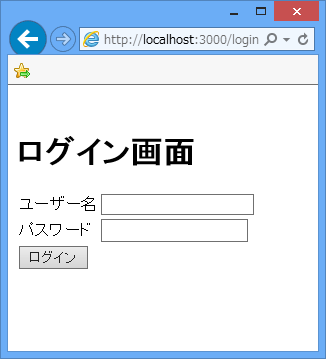
<ログイン画面>
http://localhost:3000/login

<ログイン失敗時>
http://localhost:3000/login

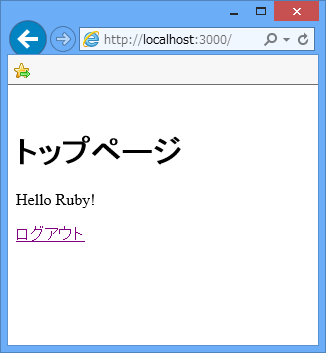
<ログイン成功時>
http://localhost:3000/
